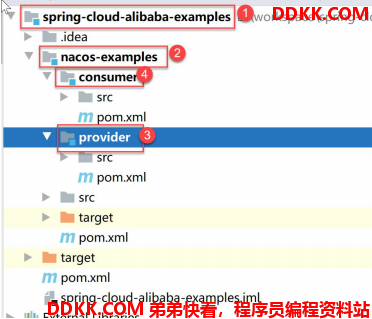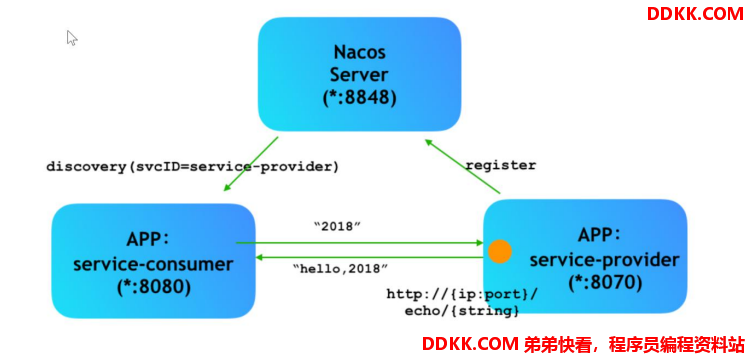
我们将使用搭建所示的测试案例
1.创建 nacos-examples 的父项目
- 我们将为 Nacos 创建一个单独项目,方便我们来演示和管理 nacos 的相关功能
- 使用 IDEA 创建一个 Maven 模块:

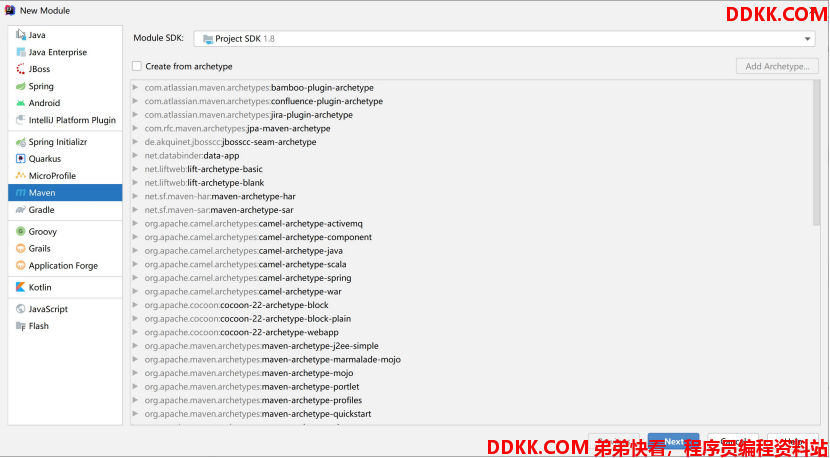
点击 next:
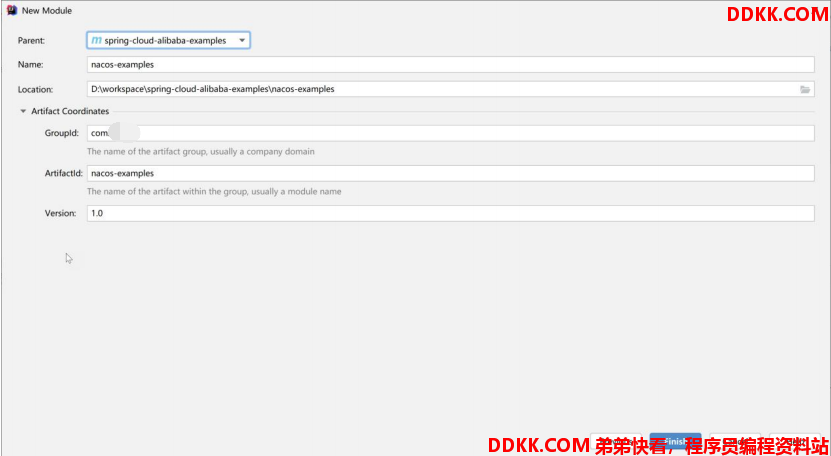
- Name:nacos-examples
- 其他项将会自动的填充进去。
- 点击 Finish 完成创建
修改 nacos-examples 里面的 pom.xml 文件,在此我们引入:
- spring-boot-starter-web (spring-boot-web 开启的最基础的依赖)
- spring-cloud-alibaba-nacos-discovery(nacos 做服务发现的最基础的依赖)
- 在
< dependencies>添加这 2 个依赖:
<dependencies>
	<dependency>
		<groupId>org.springframework.boot</groupId>
		<artifactId>spring-boot-starter-web</artifactId>
	</dependency>
	<dependency>
		<groupId>com.alibaba.cloud</groupId>
		<artifactId>spring-cloud-alibaba-nacos-discovery</artifactId>
	</dependency>
</dependencies>
修改 nacos-examples 项目的打包方式:
<packaging>pom</packaging>
最后,完整的 pom.xml 文件如下所示:
<?xml version="1.0" encoding="UTF-8"?>
<project xmlns="http://maven.apache.org/POM/4.0.0"
	xmlns:xsi="http://www.w3.org/2001/XMLSchema-instance"
	xsi:schemaLocation="http://maven.apache.org/POM/4.0.0
	http://maven.apache.org/xsd/maven-4.0.0.xsd">
	<parent>
		<artifactId>spring-cloud-alibaba-examples</artifactId>
		<groupId>com.dqcgm</groupId>
		<version>1.0</version>
	</parent>
	<modelVersion>4.0.0</modelVersion>
	<artifactId>nacos-examples</artifactId>
	<packaging>pom</packaging>
	<dependencies>
		<dependency>
			<groupId>org.springframework.boot</groupId>
			<artifactId>spring-boot-starter-web</artifactId>
		</dependency>
		<dependency>
			<groupId>com.alibaba.cloud</groupId>
			<artifactId>spring-cloud-alibaba-nacos-discovery</artifactId>
		</dependency>
	</dependencies>
</project>
2.创建服务的提供者 provider
- 服务提供者将为以后的服务消费者提供一些接口的供远程调用。
- 使用 IDEA 为 nacos-examples 创建一个子模块:

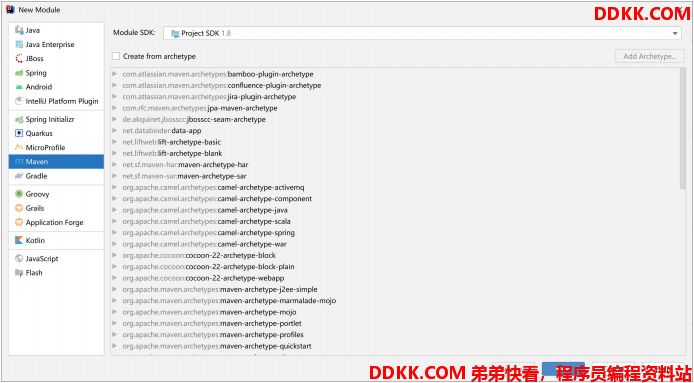
将 Next 进入下一步操作:
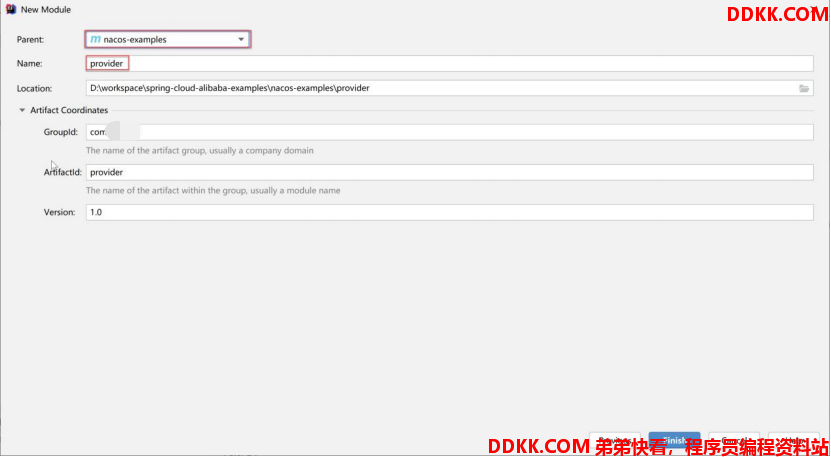
- 注意:我们的 parent 必须选择为 nacos-examples。
- Name:provider(服务的提供者)
- 其他的项将自动的填充,不需要我们修改。
- Provider 的依赖分析:

我们的 provider 已经自动的从 nacos-exmaples 里面把这 2 个依赖继承过来了。
3.创建服务的消费者
- 服务消费者将远程调用服务提供者提供的接口。
- 使用 IDEA 为 nacos-examples 创建一个子模块:

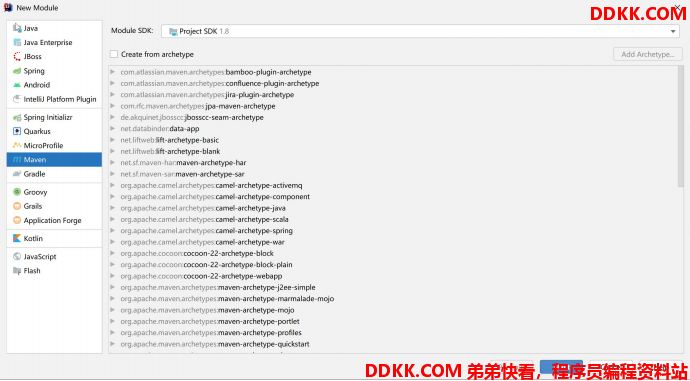
将 Next 进入下一步操作:
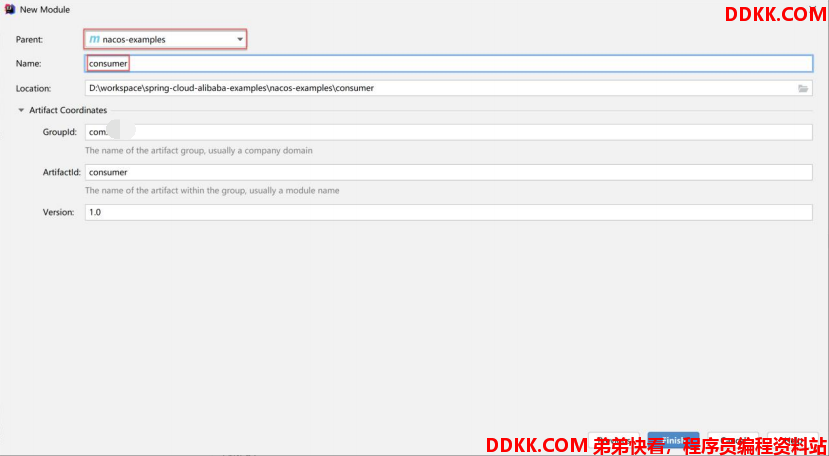
- 注意:我们的 parent 必须选择为 nacos-examples。
- Name:consumer(服务的提供者)
- 其他的项将自动的填充,不需要我们修改。
- Consumer 的依赖分析:

- 我们的 consumer 已经自动的从 nacos-exmaples 里面把这 2 个依赖继承过来了。
- 至此,我们项目的骨架已经搭建完成。如下图所示:
